
You can create the following shapes: "Pencil", "Line", "Rectangle", "Ellipse", "Arc", "Chord", "Pie", "Polygon", "Bezier Curves", "Fill", "Text", and "Picture". To create a figure, select the name of the figure in the "Shapes" item of the main menu. To create a "Pencil" shape, drag the mouse on the image along the path of the line. To create a "Polygon" shape:
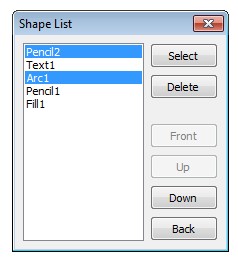
To select multiple shapes in the "Shape List" window, click its with the "Ctrl" key pressed. To select a range of shapes, click the start and end shapes with the "Shift" key pressed. To select the selected shapes in the image, click the "Select" button. To delete the selected figures, click the "Delete" button. To move the shapes to the front, click the "Front" button. To move the shapes closer one shape to the foreground, click the "Up" button. To move the shapes further one shape from the foreground, click the "Down" button. To move the shapes to the back, click the "Back" button.
To set shape properties on creation, select "Shapes\Initial Properties..." in the main menu or press Ctrl+I. A window will appear:
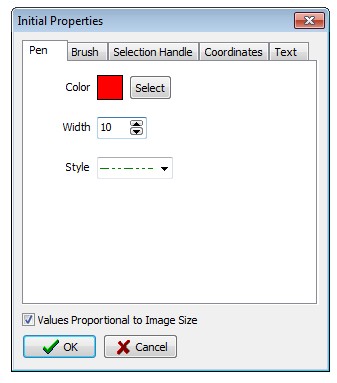
Shape properties are set in the "Initial Properties" window in the same way as in the "Shape Properties" window.
To load shapes from a file, select "File\Open Shapes..." from the main menu. To save the shapes in a file with a new name, select "File\Save Shapes As...". To save the shapes in a file with an existing name, select "File\Save Shapes" or press Ctrl+H. Loading and saving shapes is possible in SHP files. To select a shape, click the shape. To select multiple shapes, click these shapes with the "Ctrl" key pressed or drag the mouse from the upper left to the lower right corner of the rectangle containing these shapes. To cut selected shapes, select "Edit\Cut Shapes" from the main menu or select "Cut" from the context menu of the image or press Shift+Ctrl+X. To copy selected shapes, select "Edit\Copy Shapes" from the main menu or select "Copy" from the context menu of the image or press Shift+Ctrl+C. To paste the copied shapes, select "Edit\Paste Shapes" from the main menu or select "Paste" from the context menu of the image or press Shift+Ctrl+V. To delete selected shapes, select "Edit\Delete Shapes" from the main menu or select "Delete" from the context menu of the image or press Shift+Del. To select all shapes, select "Select All Shapes" from the main menu or select "Select All" from the context menu of the image or press Shift+Ctrl+A.

![]()